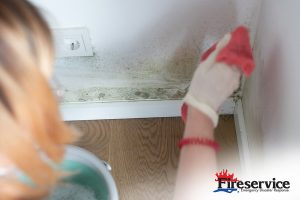
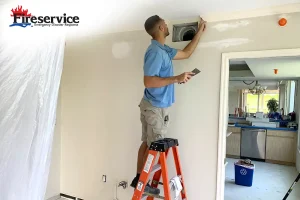
Water damage is a pervasive threat that can silently wreak havoc on both homes and businesses, often manifesting in ways that are not immediately visible. From minor leaks to catastrophic floods, the consequences of ignoring water damage can be severe and far-reaching.
Repairing water damage is not just about restoring aesthetics; it is crucial for maintaining structural integrity, ensuring health and safety, and preserving property value. Mold growth, weakened foundations, and electrical hazards are just a few of the risks associated with untreated water issues.
This article will explore common areas where water damage occurs and what the repair process looks like.
Common Areas for Water Damage
Understanding where water damage is most likely to occur can be the first step in prevention and mitigation. Common areas prone to water damage expand from basements to dishwashers and everything in between, each presenting unique risks due to plumbing failures, leaks, or environmental factors.
Basements and Crawlspaces
Basements and crawl spaces are often the first areas to experience water damage, primarily due to their location below ground level. These spaces are susceptible to flooding from heavy rainfall, groundwater seepage, or even plumbing failures. Over time, moisture can accumulate in these areas, leading to mold growth and structural deterioration. Signs of trouble may include dampness in the air, peeling paint, or musty odors.
Bathrooms
Another common site for moisture-related problems is the bathroom. Fixtures such as sinks, toilets, and bathtubs can develop leaks that go unnoticed until significant damage occurs. Poor ventilation exacerbates the issue, as steam from hot showers can lead to condensation on surfaces, promoting mold growth. Signs of water damage in bathrooms may include stained ceilings or walls, warped cabinetry, and a persistent musty smell.
Kitchens
The kitchen is another critical area where water damage can occur due to plumbing lines in sinks, dishwashers, and refrigerators. Leaks can arise from worn-out seals, loose connections, or appliance malfunctions. Water pooling under appliances or dark spots on ceilings below are common indicators of hidden leaks.
Laundry Rooms
Laundry rooms often house washing machines, which are significant sources of water damage when hoses become loose or develop leaks. Additionally, the high humidity from drying clothes can lead to condensation issues if not properly ventilated. Signs of water damage in laundry rooms may include water stains on walls or ceilings, rusting appliances, or a damp smell.

Our Water Damage Repair Process
Repairing water-damaged ceilings, bathrooms and other commonly damaged areas not only restores the aesthetic appeal of your home but is also crucial for maintaining its integrity and safety. Here we’ll take you through our process when repairing this health and safety hazard.
Identifying the Source of Water Damage
Before diving into repairs, it’s essential to pinpoint the cause of water damage. Examine the space closely for visible signs such as discoloration, sagging, or peeling paint. These indicators often reveal where moisture has infiltrated. If a leak is suspected, check the roof for missing shingles or damaged flashing that could allow rainwater to seep in. Additionally, inspect plumbing fixtures and pipes running overhead for any signs of leaks or condensation buildup.
Assessing the Extent of Damage
Once the source has been identified, evaluate how extensive the damage is. If you notice significant sagging, discoloration or soft spots, this may indicate more severe water damage that could compromise the structural integrity of the space. In such cases, it’s crucial to have the damage repaired immediately.
Gathering Necessary Tools and Materials
Before starting repairs, we gather all necessary tools and materials. Common items needed include:
- Safety goggles and gloves
- Drop cloths or plastic sheeting to protect floors and furniture
- A utility knife for cutting out damaged sections
- Drywall patching compound (if applicable)
- A putty knife for applying compound
- Primer and paint for touch-up work
- A roller or brush for painting
- A moisture meter to check drying progress (if necessary)
- A ladder for reaching high areas
Having everything prepared in advance will help streamline the repair process and ensure that we can focus on the task at hand without unnecessary interruptions.
Executing Repairs
1. Address the Source of Water Damage: Before making any repairs, it’s vital to stop further water intrusion. Fix any leaks in pipes, replace damaged roofing materials, or improve ventilation to prevent future humidity issues.
2. Remove Damaged Ceiling Material: Carefully cut away any water-damaged drywall using a utility knife. Ensure you remove all affected areas that are soft or crumbling, extending beyond visible damage to ensure all compromised material is eliminated.
3. Dry the Area Thoroughly: Once you’ve removed the damaged sections, it’s crucial to dry the surrounding area completely. Use fans or dehumidifiers to help circulate air and reduce moisture levels in the ceiling and walls. This step is vital for preventing mold growth and ensuring that new materials adhere properly during repairs.
4. Install New Drywall: After confirming that everything is dry, measure and cut a piece of drywall to fit the area where you removed the damaged material. Secure it in place using drywall screws, making sure it’s flush with the existing ceiling surface. If there are any gaps between the drywall pieces, use mesh tape or joint compound as necessary to create a smooth finish.
5. Apply Joint Compound: Once the new drywall is installed, it’s time to apply joint compound. Use a putty knife to spread the compound over the seams and screw heads. Feather the edges to ensure a smooth transition between the newly installed drywall and the existing ceiling. Allow this layer to dry completely, which may take several hours or overnight depending on humidity levels.
6. Sand and Smooth: After the joint compound has dried, use fine-grit sandpaper to gently sand down any rough areas, creating a smooth surface for painting. Be cautious not to sand too aggressively as you want to avoid damaging the surrounding ceiling.
7. Prime and Paint: With a smooth surface achieved, it’s essential to prime the repaired area before painting. Apply a coat of primer specifically designed for drywall to help seal the new material and prevent any stains from bleeding through. Once the primer is dry, apply your chosen ceiling paint using a roller or brush, ensuring to blend it well with the existing ceiling color.
8. Final Inspection: After the paint has dried, conduct a final inspection of your repair work. Check for any imperfections in the finish and make necessary touch-ups. Ensure that there are no signs of lingering moisture or mold growth.
9. Clean Up: Finally, remove all protective coverings and clean up any debris created during the repair process. Dispose of any damaged materials responsibly, especially if they show signs of mold.
10. Monitor for Future Issues: Keep an eye on the repaired area over the next few weeks to ensure that no new water damage occurs. Check for any signs of discoloration, sagging, or mold growth. If you notice any issues, address them immediately to prevent further damage.
Water Damage Repair FAQs
Whether caused by a burst pipe, severe weather, or an appliance malfunction, the aftermath of water intrusion can lead to significant structural issues and health risks if not addressed promptly. Understanding the water damage repair process is crucial for effective remediation and restoration. These commonly asked questions can help you understand the process during repairs.
Upon noticing water damage, prioritize safety by turning off electricity in affected areas and shutting off the main water supply if necessary. Remove any valuables and personal items from the vicinity to prevent further loss. Document the damage with photographs for insurance claims and contact a professional water damage restoration company promptly.
The duration of repairs varies based on the extent of the damage, types of affected materials, and overall conditions. Minor issues may be resolved within a few days, while significant flooding could extend the timeline to several weeks or more. Professionals can provide a more accurate estimate after assessing the situation.
Water damage can stem from a variety of sources, including:
– Leaking roofs or gutters
– Burst pipes
– Overflowing bathtubs, sinks, or toilets
– Flooding from heavy rain or storm surges
– Appliance malfunction – Foundation cracks or inadequate drainage
– Humidity and condensation issues
Preventive measures include:
– Regularly inspecting and maintaining your roof, gutters, and downspouts
– Checking appliances for leaks and replacing old hoses
– Ensuring proper grading around your home’s foundation to direct water away
– Installing sump pumps in flood-prone areas
– Monitoring humidity levels with dehumidifiers in damp climates
– Keeping an eye on plumbing fixtures and addressing any signs of wear or leaks promptly
While minor water damage can sometimes be managed without professional help, it’s generally recommended to hire experts for significant issues. DIY approaches might seem cost-effective, but improper handling can lead to health risks (like mold growth) or further property damage. If you’re uncertain about the severity of the situation, it’s best to consult professionals who can properly assess the damage and provide appropriate solutions.
Southwest Florida’s Water Damage Repair Experts
When faced with water damage in your home or business, the impact can be overwhelming. Whether it’s a result of a burst pipe, flooding, or a leaky roof, the aftermath often leaves property owners grappling with an array of challenges—from structural concerns to potential health hazards posed by mold growth.
While some may consider tackling the repairs themselves, hiring a professional water damage repair company, such as Fireservice, offers numerous advantages that far outweigh any temporary savings.
If your home or business needs water damage repairs, give us a call today! 239-936-1033